It has been a while since I did any radiator testing and looking to develop a new test bench V2. The old V1 bench was tore down to salvage sensors from for latter thermal testing, and I wanted to make some improvements to it as well. This blog is dedicated to the development and building of the new V2 test bench.
The Old V1 problem areas:

- No shielding – During some prototype testing I noticed that simple things like a door opening or just simple air flow around a room can cause errors.
- Air In Radiant Heat – I’m not sure, but some past comments thought my air in sensors were too close to the radiator and could be getting some radiant heat by the radiator.
- Air In sensors changed depending on radiator size – My old bench was also designed in sections where it had two air in and one air out sensor for each 120mm fan section. This complicated the processing of data requiring four different templates to turn on/off sensors that were not used.
- Fixed Water Flow @ 1.5GPM – My past V1 method was to adjust a valve to fix the flow at 1.5GPM. My thought was that would be a good average. Unfortunately, this gives a slight advantage to high restriction radiators. While flow rates effects are small, I wanted to do more of a fixed pump condition to allow the flow rate to vary as it would in a normal test system.
- Too Much Water Volume – My past V1 setup used a larger 4″ reservoir to serve as both the reservoir as well as the heater bath. Unfortunately this adds a lot of water volume and storage to the system requiring extremely long system equilibrium timeframes. This also caused some error in the result if the ambient is slightly rising or lowering.
- No Air Flow – While not really necessary, the old V1 only tested per an RPM level. I still think that is generally good, however I’ve always been curious to look at relationships to actual air flow through the radiator as well. Since I bought the hot wire anemometer for the last fan testing round update, I figured I may as well incorporate the tool into the new radiator test bench.
- 4×120 Capacity Limit – The old bench was only set up for 120mm radiators and I wanted to have the ability to test at least 140s and possibly a bit wider too.
1-5-2012 SKETCHUP CONCEPT 1 V2 Bench
So with that, I ordered more sensors, bought some wood planks, some acrylic window, and ordered in a new kill-a-watt as well as one 200 watt in-line heater to experiment with.
So far, this is what I have. I haven’t started cutting yet, but I’m looking for thoughts and opinions.

I am also considering making it much taller and enclosing the top portion with a similar 4″ outlet port to measure air out temps, but I’m hesitant to create any more bench air restriction although I suppose that wouldn’t be much different than an actual case. I just don’t think you can measure air-out temps without ducting it, the fans cause too much disturbance and again I don’t want to be moving the sensors. I feel strongly that a good test bench much fix the sensors independent of the product being tested for consistency.
I’m also debating on the CPU block. It’s not really necessary with the variable speed pump. I could simply adjust the pump speed to a low pumping level, perhaps level 2 or so to get approximately 1.5GPM with an average restriction radiator and call it good. I may also include a flow meter for the additional flow data.
Another uncertainty is the sensor types and control. The options are the higher number of sensors and more accurate Dallas One Wire .2C accuracy sensors using the Crystalfontz and using Excel to post process, or use the Aquaero 5 and have the ability to monitor result real time with great plotting of all the results on a single page but with a maximum of 8 total sensors. I see benefits to both, but leaning toward the Crystalfontz due to the more accurate and higher number of sensors allows.
Finally there is also some question about which pump to use. I am a bit divided between a PMP-450 (D5 vario) and the aquastream XT. Both provide enough pumping power for what I’m trying to do although I may be able to control 5W worth of fan speeds using the aquastream and would probably have a bit more refined pump speed control using the aquastream.
As far as fans, I’m not sure, but thinking I’ll use GT15s this time around for something like a 600,1200,1850 RPM test and maybe something else for high speed. I have three GT15s that could go to the cause, but I’d have to probably order the others or see a sponsor for the other fans. I am also a bit unsure about fan control yet, may use voltage, may use my crystalfontz PWM%, or I may use the AQ5 if I get a new main board.
Anyhow, looking for your thoughts. Once I get the box and sensor system built, I’ll probably start in on some basic shroud testing on a single 120mm rad to see how it goes.
Cheers!
Martin
1-7-12
I got my Hydor 200W In-Line heater in and checked it out. It’s a fairly simple unit. It’s basically just a glass tube with thin coils around the perimeter necked down for the barb ends. That’s good for practically no restriction, but there is some volume of water in there due to the larger glass interior. Anyhow, here are a couple of pictures. I’m debating on using it or building my own slim reservoir to hold an aquarium heater. I thought these in-line heaters would be smaller and have very little internal volume.


And here is a slight modification to allow air-out measurement with a fully enclosed idea:

And just the same thing rendered with paint for fun..:)

But enough playing with models and renders, time to break out the table and scroll saws..

Even though this is just a test rig, I couldn’t help but dado in the joints.


And a quick dry fit test, and it’s starting to look like the plan. I just need to spend some time with the router table tomorrow and make some cuts for the back and windows, a little sanding, and I’ll be off to gluing and finishing.
1-8-12
Got most of the actual enclosure portion built, now it’s time to do all the plumbing and electrical. Not quite sure I want to use the In-line Hydor heater or not, but I suppose I should at least try it temporarily. Look back on my past radiator testing, I was using upwards of 600 watts worth of heater to do the quad radiators. I didn’t spend much time finishing considering this is just a test rig, but it came out pretty good for rather minimal time put into it.


And, here is the mess of heater options to choose from. The aquarium heaters are nice and slim, but they are rather long.

I was working on a 1″ PVC slim reservoir/bath for the heater to the far left that helps a bit, but still fairly long. The advantage of that is I can buy up to 500w heaters that could slip right in/out of the reservoir where the in-line heaters are a bit more difficult to switch out. Hmmm….
1-9-12
Decided to go forward with the PVC heater bath/mini reservoir as seemed to provide the most clean routing and also provide an opportunity for easier switching of heat values. I currently have 200 and 300w aquarium heaters with disabled safety switches and with a little search have found 500, 800, and 1000W variants as well as 150s. I’m thinking a 200W and 500W would make a good heat source option for 1-2 sections and 3-4 sections tested respectively. I previously tested at up to 600W worth of heat but that was quite a bit for even my previous 1000RPM low end. I’m thinking my new test method will be looking to lower the min RPM to 600-800 range.
Anyhow, after making the decision, the plumbing went fairly smooth. The hardest part was fabricating the acetal hold down bracket for the heater, the rest was assembling various spare parts.
Using the Danger Den MC-TDX and the Koolance PMP-450 at setting 3 would net flow rates right around 1.5GPM on average depending on the radiator restriction. More free flow radiators could see 1.8GPM while more restrictive ones could see 1.3GPM or so. I think that’s a good pump/restriction scenario.

1-12-12
I decided to redo the sensors at the air out port to reduce as much restriction as possible.

That’s better…
And for the inlet port, I wanted a more controlled velocity profile for the anemometer, so I turned this piece of 4″ coupling to make a short port with a nice tapered inlet. Excuse the messy lathe covered in chips from various garage projects…:)

And this is the result after mounting the hot wire anemometer probe and thermal sensors.

Continuing with the low restriction port theme, I carefully soldered the sensors onto the flat wire and simply extended them into the stream of flow spaced evenly around the port. The 6 air in thermal sensors are one of the more critical for that water/air in delta number, so I spent a little more time on this. The length of the port also helps separate the anemometer air flow sensor from the temp sensors and still allows me to slide the anemometer hot wire probe shut for calibration.
1/14/02
Pretty much got her done. Building the water sensors was it’s usual pain and more so since I wanted to have four for each in and out of the radiator. I ended up burning one of the inlet sensors, but otherwise it went pretty well. Not so surprisingly since each sensor is buried in the same hunk of brass, they all measure pretty much the same anyhow, three will be more than adequate.


Below is a quick view of the simple acrylic radiator templates. This is one for single 120mm radiators, and it’s really easy to make anything from 1×120 up to 4×140.


Above you can see the water sensors in place before insulating the lines.

With the emphasis to minimize all external losses to help speed up equilibrium time and also more accurately represent heat loads without pipe loss, I insulated everything. The pump itself is producing about 8 watts of heat at setting 3, so it’s as simple as dialing in my variac to 192 watts to test at a 200 watt load. There will still be some very minor losses, but it’s about as good as you can do from a power consumption measurement standpoint.
In testing the pump at setting three I got the following information:

The pump setting at #3 and block used will produce roughly a 1.5GPM flow rate depending on the radiator restriction. At that point it is operating at about a 14% efficiency and producing roughly 8 watts of heat. The D5 series also has a metal pump housing which acts as a water cooling to the pump electronics. Very little of the heat actually escapes through the exterior, so I think 8 watts is a good estimated added heat level.
 Another view of the whole bench.

I will probably change out the fan controller to the Aquaero 5 later, but for trial runs and some shroud testing, this will do.
In total this gave me 17 temperature sensors which took a little while to map out. Using the Cystalfontz, this is what I see:

This bench is Done…:) Time for testing…
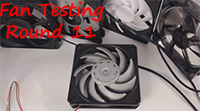
THE FANS
I’ve been thinking pretty hard about what fans to use, and decided to spend some time looking over some CFM vs RPM data I collected in my round 6 fan testing. While not all fans follow suite, generally I could lump most of the fans into three categories, your typical 7 blade 25mm fan, a more dense blade 25mm fan, and 38mm fans. This is how a few of them compare:

Initially I thought about using gentle typhoons since they tested so well and becoming fairly popular, but I only had three of them on hand. I also bought enough Delta’s to use and noticed that they test exceptionally strong in CFM vs RPM so trying to mix data between GTs and Deltas would make a big mismatch at the matching end. I really wanted to just use one fan that would cover all bases from 600-3000RPM. After doing some more testing on my Delta AFB1212HE, I found that I could dial RPM down to 600RPM if they are started at higher speeds. Also after looking at the very linear results here I don’t see why I couldn’t just test with the Delta at all RPMs and then correct the RPM results to GT15 and Yate Loons for three sets of data. Still thinking about this, but I think it should work just fine.
Here is the round 8 run compared to the yate loon and the actual HE model which did include some points down low:

In the 600 RPM range, the yate requires about 130RPM more to get the same CFM.
In the 140 RPM range the yate take about 350RPM more…etc.
In the end I think it does make sense to test with just one fan and correlate the results to something like the yate loon 25mm which would represent many of the 7 blade 25mm fans.
Still a bit undecided on which fans to use. I am also considering Gentle Typhoon AP-29s as that would offer a similar 600-3000RPM range in a more traditional 25mm fan thickness. I’ll give Scythe a buzz and see if they are interested in sponsoring.
In the end, this is basically what I built:
MATERIALS EQUIPMENT LIST:
- Temperature Probes: Dallas Digital One Wire DS18B20 probes. These are good to about .2C absolute accuracy in normal water cooling temp ranges and have a nice fine .0625C resolution. Also since they communicate digitally, you can string the power, ground and Vdd wire in series between all the sensors limiting the amount of wires significantly.
- Anemometer: Extech 40723 Hot Wire Anemometer for measuring air velocity: http://www.extech.com/instruments/product.asp?catid=1&prodid=39
- Pump: Koolance PMP-450 Setting 3
- Block: Danger Den MC-TDX block
- Heater: Standard Aquarium Heaters with safety switch soldered in the closed position so heat remains on regardless of temperature. This requires removing the heater element from the glass tube, soldering the two tabs together and putting it all back together. I like testing around 100W per fan section as a ballpark. I am also gaining roughly 9 watts from the pump at setting 3 based on previous pump testing.
- Heater/Reservoir Bath: I fabricated this from 1″ schedule 40 PVC with a T and elbow to 1/2″NPT threaded fittings and then used NPT nylon barbs to connect tubing. The cap I had to use a 1-1/4″ threaded cap and turned it in my lathe to fit the exterior of the 1″ T fitting.
- Insulation was a combination of 1″ and 1/2″ pipe insulationg cut to fit.
- Tubing is 3/8″ ID x 1/2″ OD tubing.
- Case Material – 1/2″ x 8″ Pine it’s a little over 24″ wide to barely fit 4x140mm rads. The bench overall height is about 18″.
- Inlet port was fabricated from a 4″ flange material making an ID opening of 4.540″ Diameter. I shaved the threads out of it and tapered the inlet on the lathe for a smoother inlet.
- Acrylic panels are all .100″ thickness and I dado cut slots into the shelves for them to fit into.
- Multi-meter for the fans is just a Cen-Tech hard wired at the fan plug in.
- Current Fan Controller is a Scythe Kaze Master, will likely upgrade to something else later.
- Heater Control is via a 3A generic Variac, although 5A would be better for higher heat loads. I generally find the variac does a good job at not only controlling voltage down, but also stabilizes the voltage to be more smooth. Reducing voltage from 120 volts to 100 or so gives stability such that the watts from the heater on a 125W setting rarely deviates more than a couple of watts.
- For Watt Metering – P3 Kill-A-Watt and just manually observing and correcting wattage.
That’s all, hope this helps!
Martin


You must be logged in to post a comment.